


Have you even wondered why people recommend shooting in Manual mode vs Auto mode? In this guide, Auto vs Manual Mode Part 1, I will show you examples of the same scenario in both Auto and Manual mode. As well as, the settings I chose for manual mode in each scenario and why.
SOOC
No the header above is not a typo, SOOC, stands for straight out of camera. Often times you will see this term used when someone is presenting an image for critique or asking help on how to fix their image or settings. It’s also used for examples, sometimes it can be hard to learn from images that have been edited. All the images in this post are SOOC and have not been altered so you can see first hand the difference an image has in Auto vs Manual mode Part 1. In Part 2 tomorrow, I will walk through how I would edit each of these images.
One
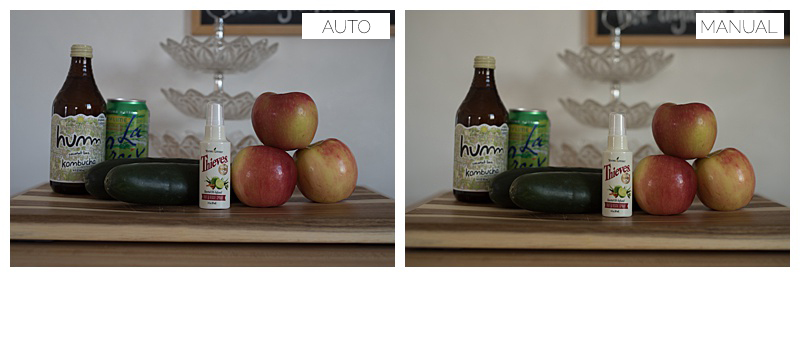
I took this first set in my kitchen, it doesn’t have a ton of light. However, there is a window to the right of my frames and lets in enough light to use the area for photos. In the Auto image you can see that the automatic white balance is putting off a cooler tone to the image compared to the manual image. The Manual images white balance is correct because the floor in our kitchen and where I am taking the image casts a “warm” tone on the white walls in the background. In Automatic the cameras white balance over compensated for the warm tint in the kitchen and it now appears to be on the cooler side of the spectrum which is not true to life. I personally use a custom white balancing disc called an Expo Disc to set my white balance for each photo.
Here are the settings the camera set in Automatic: 1/60th of a sec (shutter speed), F4.0 (aperture/fstop) and ISO 450. In Auto mode the camera set a low shutter speed to compensate for the lower light in the kitchen. In addition it was compensating for the higher fstop setting it chose. I never recommend shooting below 1/125th of a second because there is a higher chance of shaky and out of focus images. Here is what I set my settings for manual: 1/125th of a sec (shutter speed), F2.8 and ISO 400. The manual image is still a little dark for my liking. However, tomorrow I will show you how I would edit this image to my preference. I used the above manual settings so I didn’t blow out any highlights, therefore loosing detail in the highlights and white areas of the image.
Two
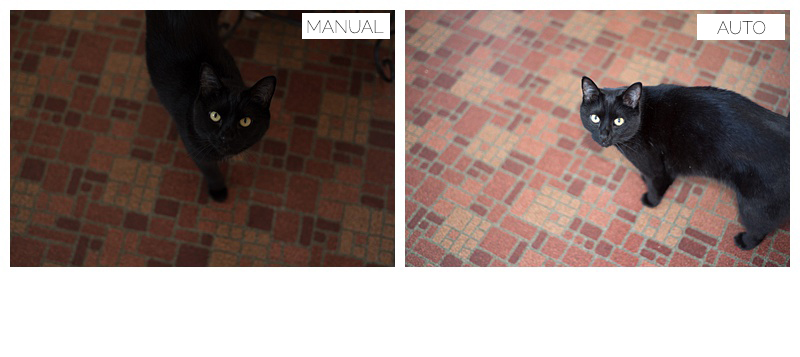
This second image was also taken in our image and you can see we have a red/brown linoleum floor in there. It is darker and casts a warmer tint in our kitchen, as well as, swallows any light reflection. Lighter colored surfaces reflect light back up, whereas darker surfaces swallows light. My manual image, on the left and auto on the right are vastly different. The main reason that in Auto the flash was triggered.
Manual settings: 1/125th (shutter speed), F2.8 (aperture/fstop) and ISO 640. Auto settings: 1/60th (shutter speed), F2.0 (aperture/fstop and ISO 640, plus a triggered flash. The flash triggered when I pointed the camera down towards the floor to compensate for the lack of light.
Three
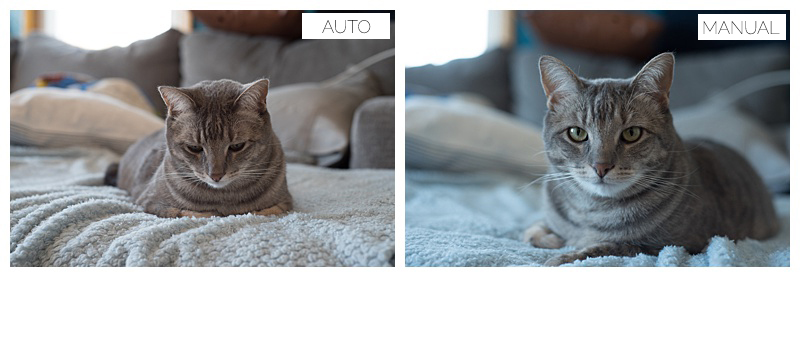
Don’t judge all the pillows flopped around carelessly on the couch. I want to address the white balance of these images. Anywhere you take a photo the ground, surroundings, everything will cast a different tint of light depending on where you are. Therefore, you can expect if your child sits in grass, the grass will cast a green tint on your child’s skin. Blue (our cat) is laying on a baby blue fleece blanket. Her natural fur coloring is grey and a clean white/cream color. Naturally the blue blanket she is on will cast a cooler tint on her. However, opposite of what Auto mode did in our kitchen, it over compensated in the above image with a warmer tint. The blanket in auto mode does not appear to be clean baby blue color and Blue (our cat lol) looks like she has brown shades in her coat. Is this post, Auto vs Manual Mode Part 1 becoming more clear why manual mode is preferred?
Auto Settings: 1/60th of a sec (shutter speed), F4.0 (aperture/fstop) and ISO 640. Manual settings: 1/125th of a sec (shutter speed), F2.8 and ISO 640.
Four
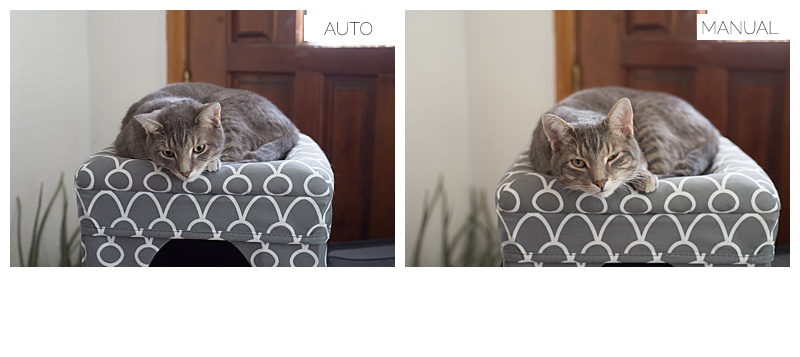
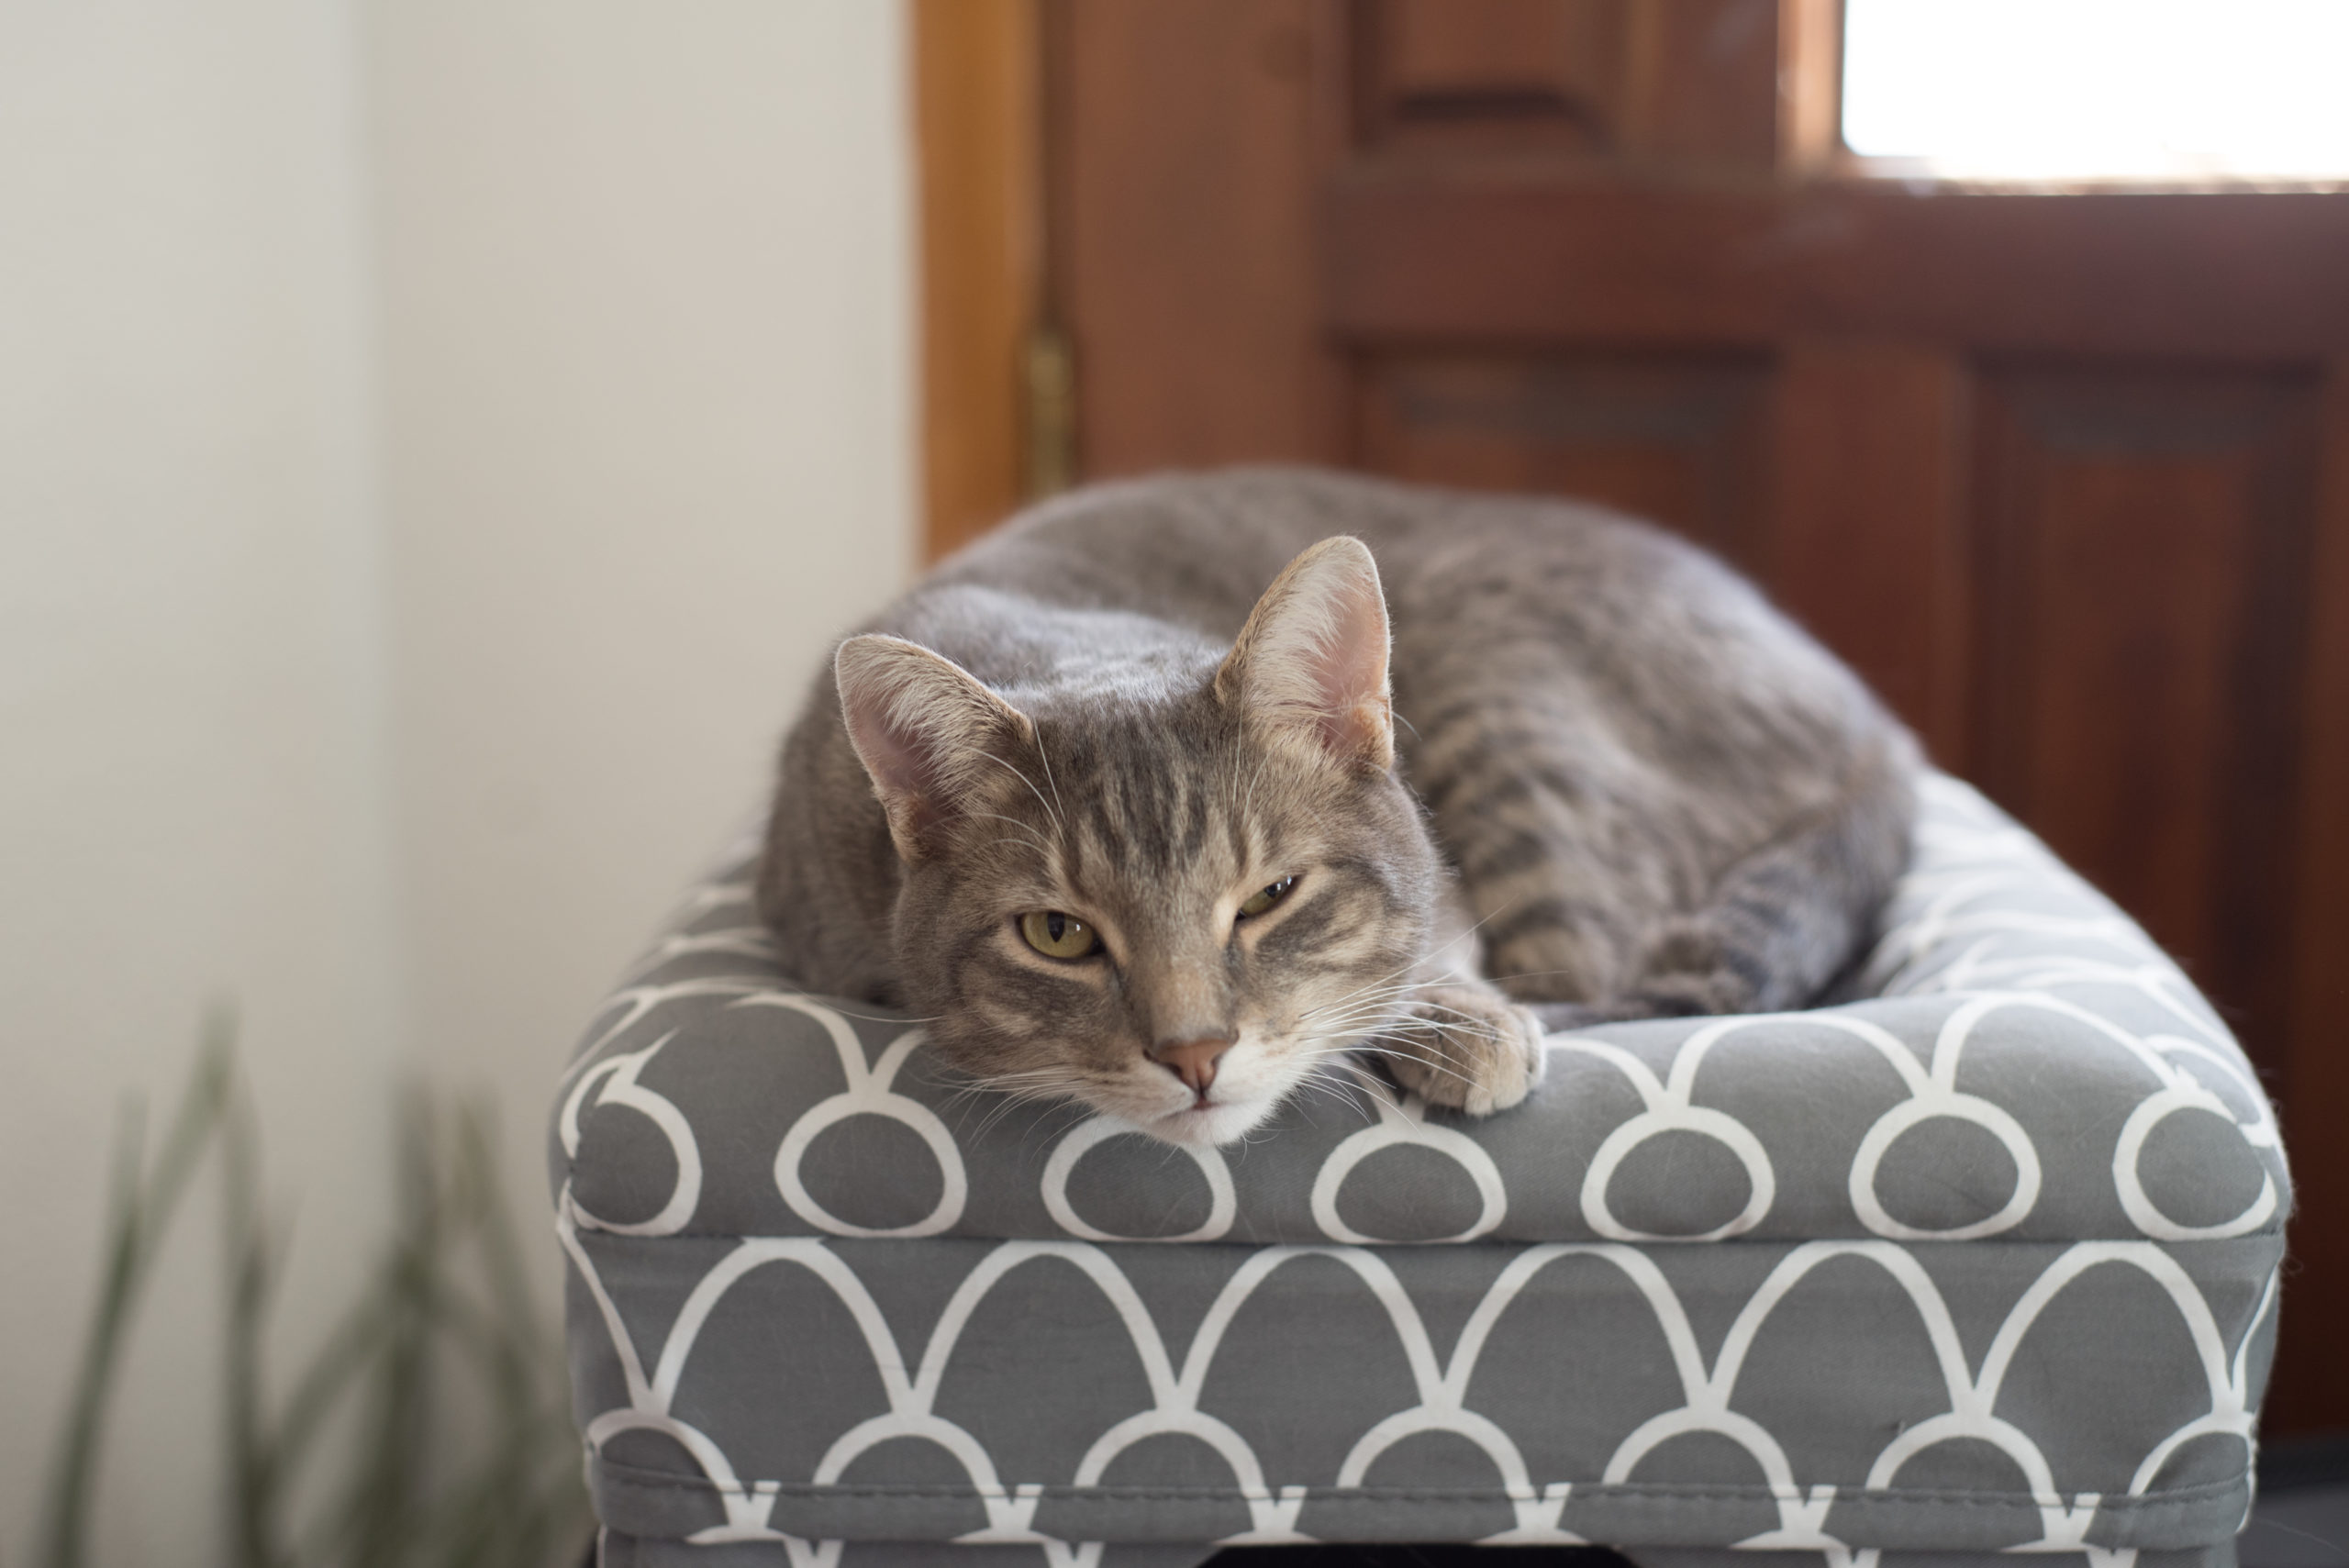
Again, the white balance in Auto has over compensated for the warm tint in this area. Behind Smokey our front door has a stained glass window that has yellow pieces of glass. Naturally, the light in this area looks warmer because of the yellow glass that the light travels through into this room. Off topic, but I clearly caught Smokey halfway through his blink.
Auto settings: 1/60th of a second (shutter speed), F4.0 (aperture/fstop) and ISO 560. Manual Settings: 1/125th of a second (shutter speed), F2.8 (aperture/fstop) and ISO 640.
Five
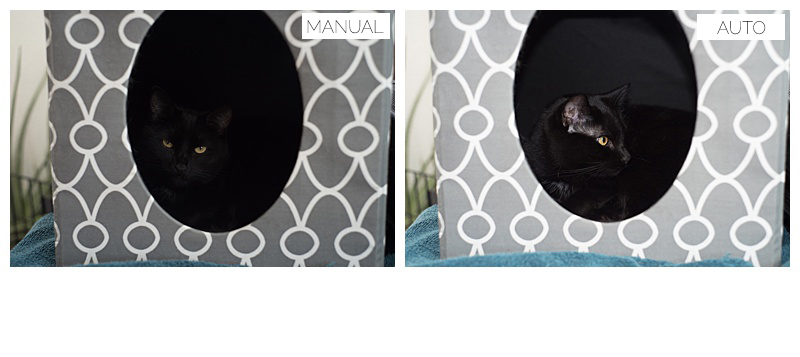
Last one! So we are in the same area of my house as the above image with Smokey! However, since what I focused on was Midnight in a dark space, in Auto mode the flash triggered again. Simply because she is a black cat inside a black lined box. Tomorrow you will be able to see during editing why the manual settings are preferred even in this image!
Manual settings: 1/125th of a sec (shutter speed), F2.8 (aperture/fstop) and ISO 1000. Auto settings: 1/60th of a sec (shutter speed), F2.8 (aperture/fstop) and ISO 800.
If you found this blog post, Auto vs Manual Mode Part 1, helpful you may also like this post. As mentioned, I use a custom white balancing disc to set my white balance, it can be bought here.


leave a comment